반응형
이전에 추가한 데이터를 기반으로 설명하겠습니다.
collection.add(
    documents=["This is document1", "This is document2"], # we embed for you, or bring your own
    metadatas=[{"source": "notion"}, {"source": "google-docs"}], # filter on arbitrary metadata!
    ids=["doc1", "doc2"], # must be unique for each doc
)
http 방식으로 데이터를 쿼리는 다음과 같이 합니다.
import chromadb

client = chromadb.HttpClient()
collection = client.get_or_create_collection("sample_collection")
# Add docs to the collection. Can also update and delete. Row-based API coming soon!

results = collection.query(
    query_texts=["This is document1"],
    n_results=2,
    # where={"metadata_field": "is_equal_to_this"}, # optional filter
    # where_document={"$contains":"search_string"}  # optional filter
)

print(results)
로컬 방식으로 데이터를 쿼리는 다음과 같습니다.
import chromadb

client = chromadb.PersistentClient(path="./chroma_db")
collection = client.get_or_create_collection("sample_collection")

results = collection.query(
    query_texts=["This is document1"],
    n_results=2
)

print(results)
둘 다 결과는 동일합니다.
{'ids': [['doc1', 'doc2']], 'distances': [[0.0, 0.2221482790326065]], 'embeddings': None, 'metadatas': [[{'source': 'notion'}, {'source': 'google-docs'}]], 'documents': [['This is document1', 'This is document2']], 'uris': None, 'data': None, 'included': ['distances', 'documents', 'metadatas']}
트리 형태로 보면 다음과 같습니다.
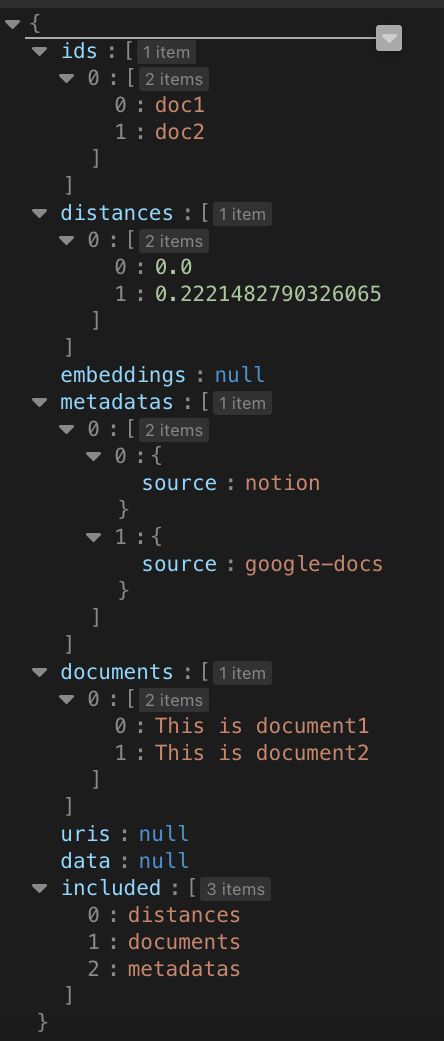
distances 값이 적은 것이 정확도가 높은 겁니다.
collection 전체는 다음과 같이 가져옵니다.
import chromadb

client = chromadb.PersistentClient(path="./chroma_db")
collection = client.get_or_create_collection("sample_collection")

# 전체 문서 조회
all_docs = collection.get()

print(all_docs)
간단하죠? 현재 추가한 데이터는 위 2개가 전부여서 결과는 같습니다.
반응형
'프로그램 개발해서 돈벌기 > python' 카테고리의 다른 글
| venv를 사용해서 python 가상 환경 만들기 (0) | 2025.05.20 |
|---|---|
| chroma 디비에 데이터 추가, 업데이트, 업데이트 / 추가, 삭제 (0) | 2025.04.25 |
| chroma 디비 생성과 데몬 실행 (0) | 2025.04.21 |
| pip install 실행 시 externally-managed-environment를 만났을때 해결 방법 (3) | 2024.12.28 |


댓글